Step 1: Credit Check
- Agent sends rental application and ID's to leasing@regorealty.ca for credit check
- Leasing admin runs credit check and sends report back to agent
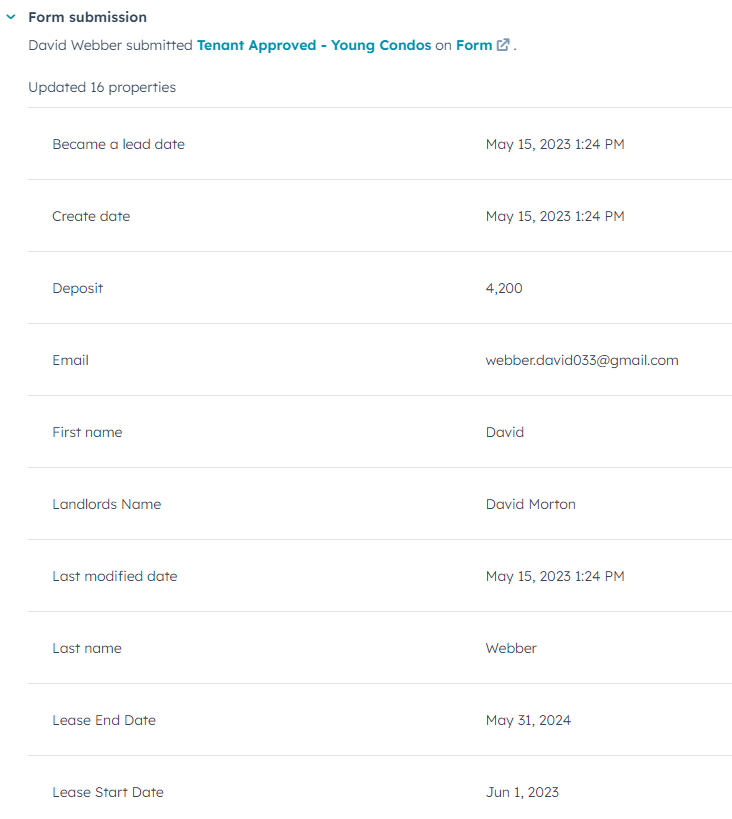
- Once approved, agent submits leasing form
Step 2: Prepare Leasing Paperwork
- A "Task Assigned" email is sent to leasing from HubSpot
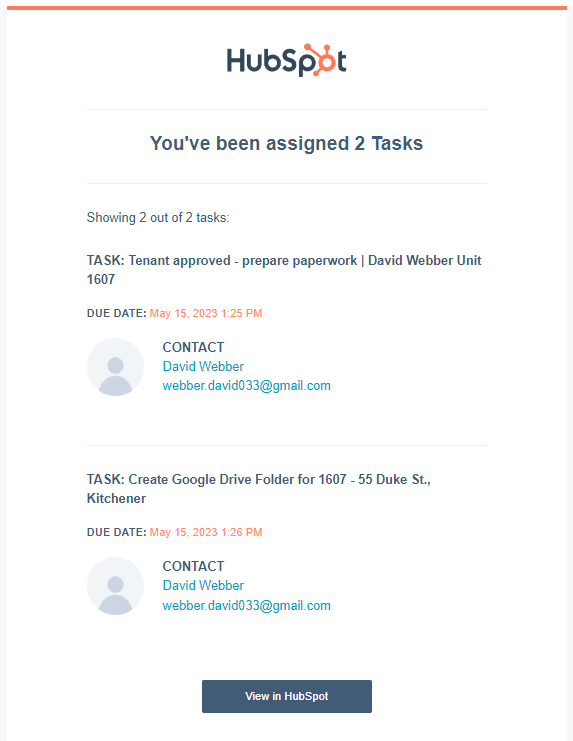
- Task: Create Google Drive Folder (if not already done)
- Name: Unit #
- Save Rental Application and other applicable documents
- Create Subfolders
- Landlord Docs
- Signed Docs
- Task: Prepare Leasing Paperwork
- Task: Create Google Drive Folder (if not already done)
-
-
- Log into itsorealesate.com
- Select "Tools" → "Webforms 2019"
- "Dashboard" → "Impersonate Agent" → Select Agent who submitted form
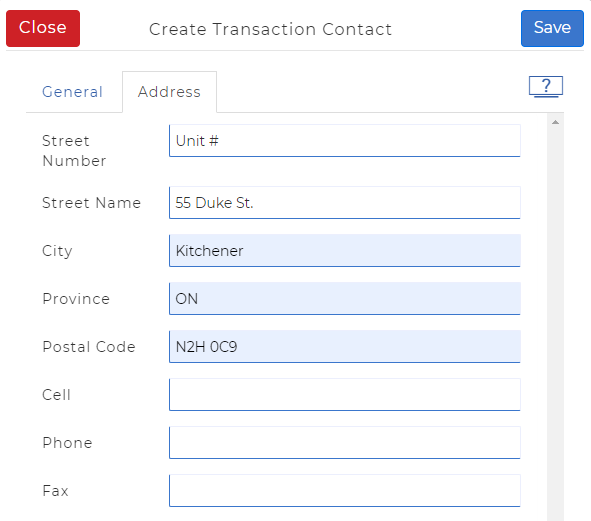
- Create a new transaction
- Name: Unit # - 55 Duke St., Kitchener
- Template: Young Condos
- Add me as the: Neither
- Select “Use Wizard"
-
- Enter transaction details using leasing form
- Details
- Enter address (55 Duke St. W., Kitchener, ON N2H 0C9)
- Transaction Dates
- Contract Date: 1 week prior to creating transaction
- Expiry Date: Tenancy start date
- Contacts
- Add tenant(s) - Type: Tenant
- Enter unit # as address
- Enter unit # as address
- Add Landlord(s) - Type: General
- Email can be found on the tracking spreadsheet
- Edit Contact "Buyer c/o Y Property Management Inc."
- Enter landlord(s) full name(s) in "First Name" and save

- Enter landlord(s) full name(s) in "First Name" and save
- Enter guarantor information (if applicable)
- Add tenant(s) - Type: Tenant
- Forms
- Residential Tenancy Agreement
- Verify if unit has a parking space and locker (refer to spreadsheet and APS in the New Homes folder)
- Add tenant(s) email
- Enter tenancy start/end date
- Enter rent amount
- Enter pro-rated rent (if necessary):
=(# of days in month - tenancy start date + 1) * total rent/# of days in month
- Enter rent deposit amount
- Enter key deposit (if necessary)
- Residential Tenancy Agreement
- Details
Step 3: Send Lease Authorization and Tenant Fill Amendment
- Go to Documents and select "YC_Authorization to Lease" → "Send To New Authentisign"

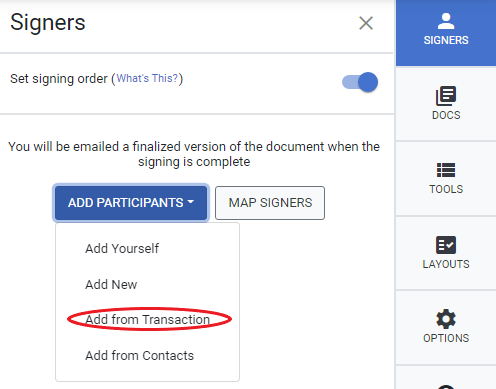
- Add signers (no signing order)
- Daniela Feliciano - Type CC
- Rego Realty Leasing - Type CC
- Landlord(s) - Type Remote Signer
- Tenant(s) - Type Remote Signer
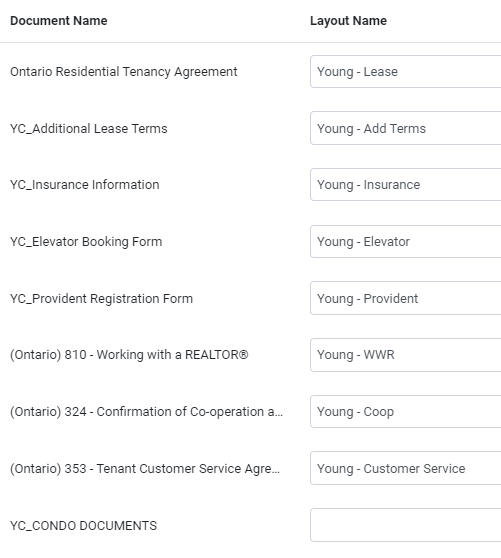
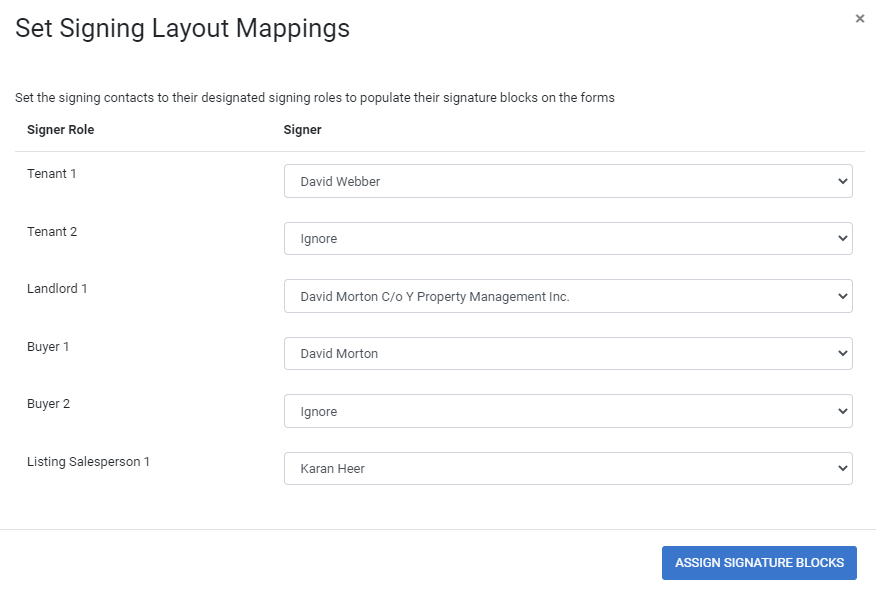
- Click "Layouts" → "Layout Options" → "Apply Layouts"
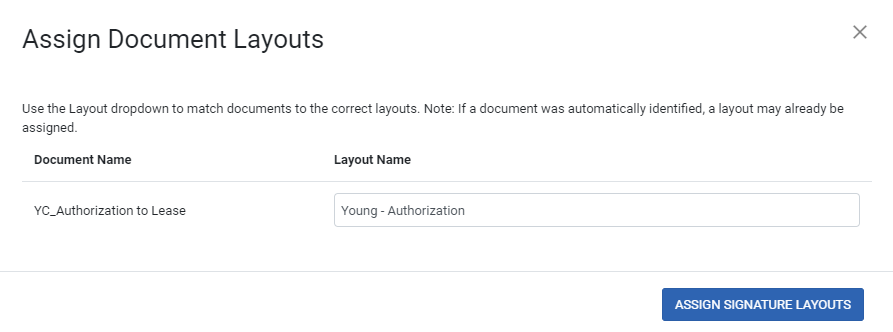
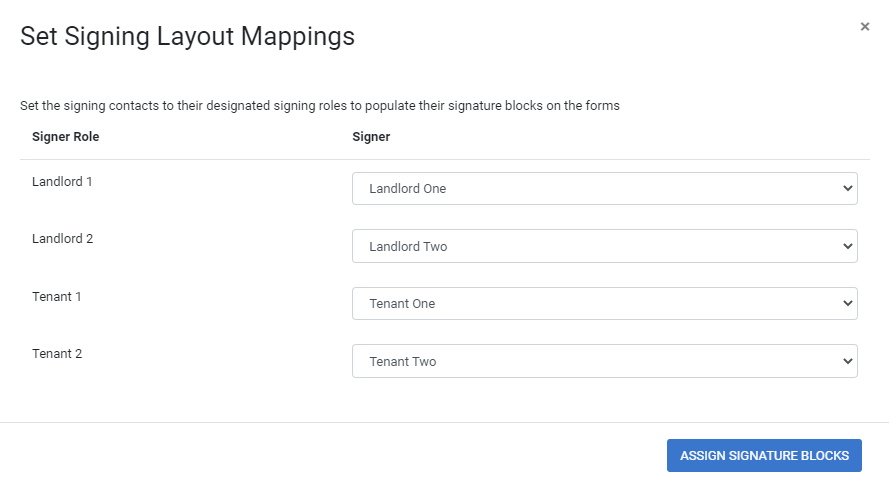
- Map Signers and Assign Signature Blocks
- Refer to APS to fill out missing information
- Select “Next” → "Customize Invites" → "Import Message" → "Young Authorization"
- Save and Send
- Return to Documents and select "Tenant Fill and PM_Assigment during Occupancy" → "Send To New Authentisign"
- Repeat steps 2 - 7 (Note differences below)
- Signers/Signing Order:
- Rego Realty Leasing - Type CC
- Landlord(s) - Type Remote Signer
- Jennifer Rose - Type Remote Signer
- Layout: Young - Tenant Fill
- Refer to Opt-in form to fill missing information
- Import Custom Message: Young Tenant Fill
- Signers/Signing Order:

Step 4: Draft Lease
- Return to Documents and select all → Remove Authorization and Tenant Fill → "Send To New Authentisign"
- Change signing name to "Unit # - 55 Duke St., Kitchener - Lease Agreement"
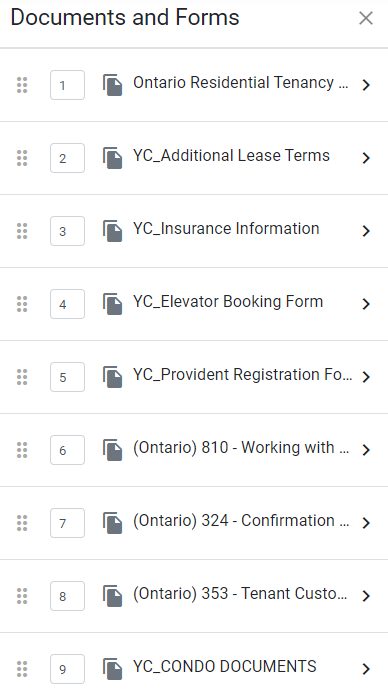
- Go to Documents tab and add remaining docs (order below)
Add Guarantor Agreement after additional terms if required
- Add Signers (signing order below)
- Rego Realty Leasing - Type CC
- Landlord(s) - Type Remote Signer
- Tenant(s) - Type Remote Signer
- Guarantor (if applicable) - Type Remote Signer
- Agent - Type Remote Signer
- Karen/Y Property - Type Remote Signer
- NOTE: Change YP's Custom Signature to "Karen Peebles" and Custom Initials to "KP"

- NOTE: Change YP's Custom Signature to "Karen Peebles" and Custom Initials to "KP"
- Apply Layouts
- Map Signers and Assign Signature Blocks
- Review lease and enter missing information
- Select “Next” → "Customize Invites" → "Import Message" → "Young Lease"
- NOTE: TENANT ONLY, NO EMAIL REQUIRED FOR OTHER SIGNERS
- Send lease
- Send signing email through HubSpot (template in leasing inbox)
DO NOT SEND LEASE UNTIL AUTHORIZATION FORM HAS BEEN SIGNED
Step 5: Update Tracking Spreadsheet
Step 6: Verify Signing Completion
- Save signed docs to to Google Drive Folder
- Move transaction folder from "In Progress" to "Executed"
- Send copy of signed lease to youngcondosmanagement@wilsonblanchard.com (template in leasing inbox)
- Send Provident form to customerservice@pemi.com (template in leasing inbox)
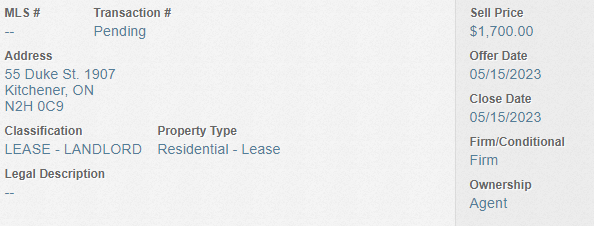
- Create transaction in WOLFconnect
- Classification: LEASE - LANDLORD
- Property Type: Residential - Lease
- Sell Price: Rent amount
- Offer Date: Date signed by YP
- Close Date: Lease start date
- Seller: "Buyer(s)" c/o Y Property Management Inc.
- Buyer(s): Tenant

- Follow up for tenant insurance and deposit confirmation
- Tenants are to send leasing a screenshot as confirmation that there deposit has been sent to accounting.
- Once all documents and deposits have been received, send tenants an email to introduce Chetan from YP (template in leasing inbox)
- CC chetan@yproperty.ca
UPDATE TRACKING SPREADSHEET AS DOCUMENTS ARE RECEIVED